


ChirpyToday at 2:21 PM
the lye is used to test if it's zinc alloy or aluminum
[2:21 PM]
lye doesnt do much to zinc, but it reacts pretty agressively towards aluminum
Dusty Dan HToday at 2:21 PM
Oh I was thinking it bubbled on magnesium
ChirpyToday at 2:21 PM
vinegar bubbles on magnesium, lol

This blower setup is a blow dryer powered by an refurbished slot car power pack from the mid 60s. With the blower running the pack is delivering 13V. On the bench supply the blower used 1A at 12V and 1.3A at 14V.
 |  |
| The original selenium rectifier | Replaced with 2 1N4007 diodes |


 |  |
| Welded tank to frame and made the fender | Moved burner up. Patched over plumbing holes. |
This takes me up to today. Installing the ceramic wool. The hope is to have enough left over for a new version of the test furnace, or maybe an electric burnout oven. So I will try to conserve it where possible.
 |  |
| Cutting the ceramic wool. Itchy crap! | First layer. |
 |  |
| Second Layer | Perlite to level the bottom |
 |  |
| Perlite in place | Jig to cut pattern for bottom insulation |
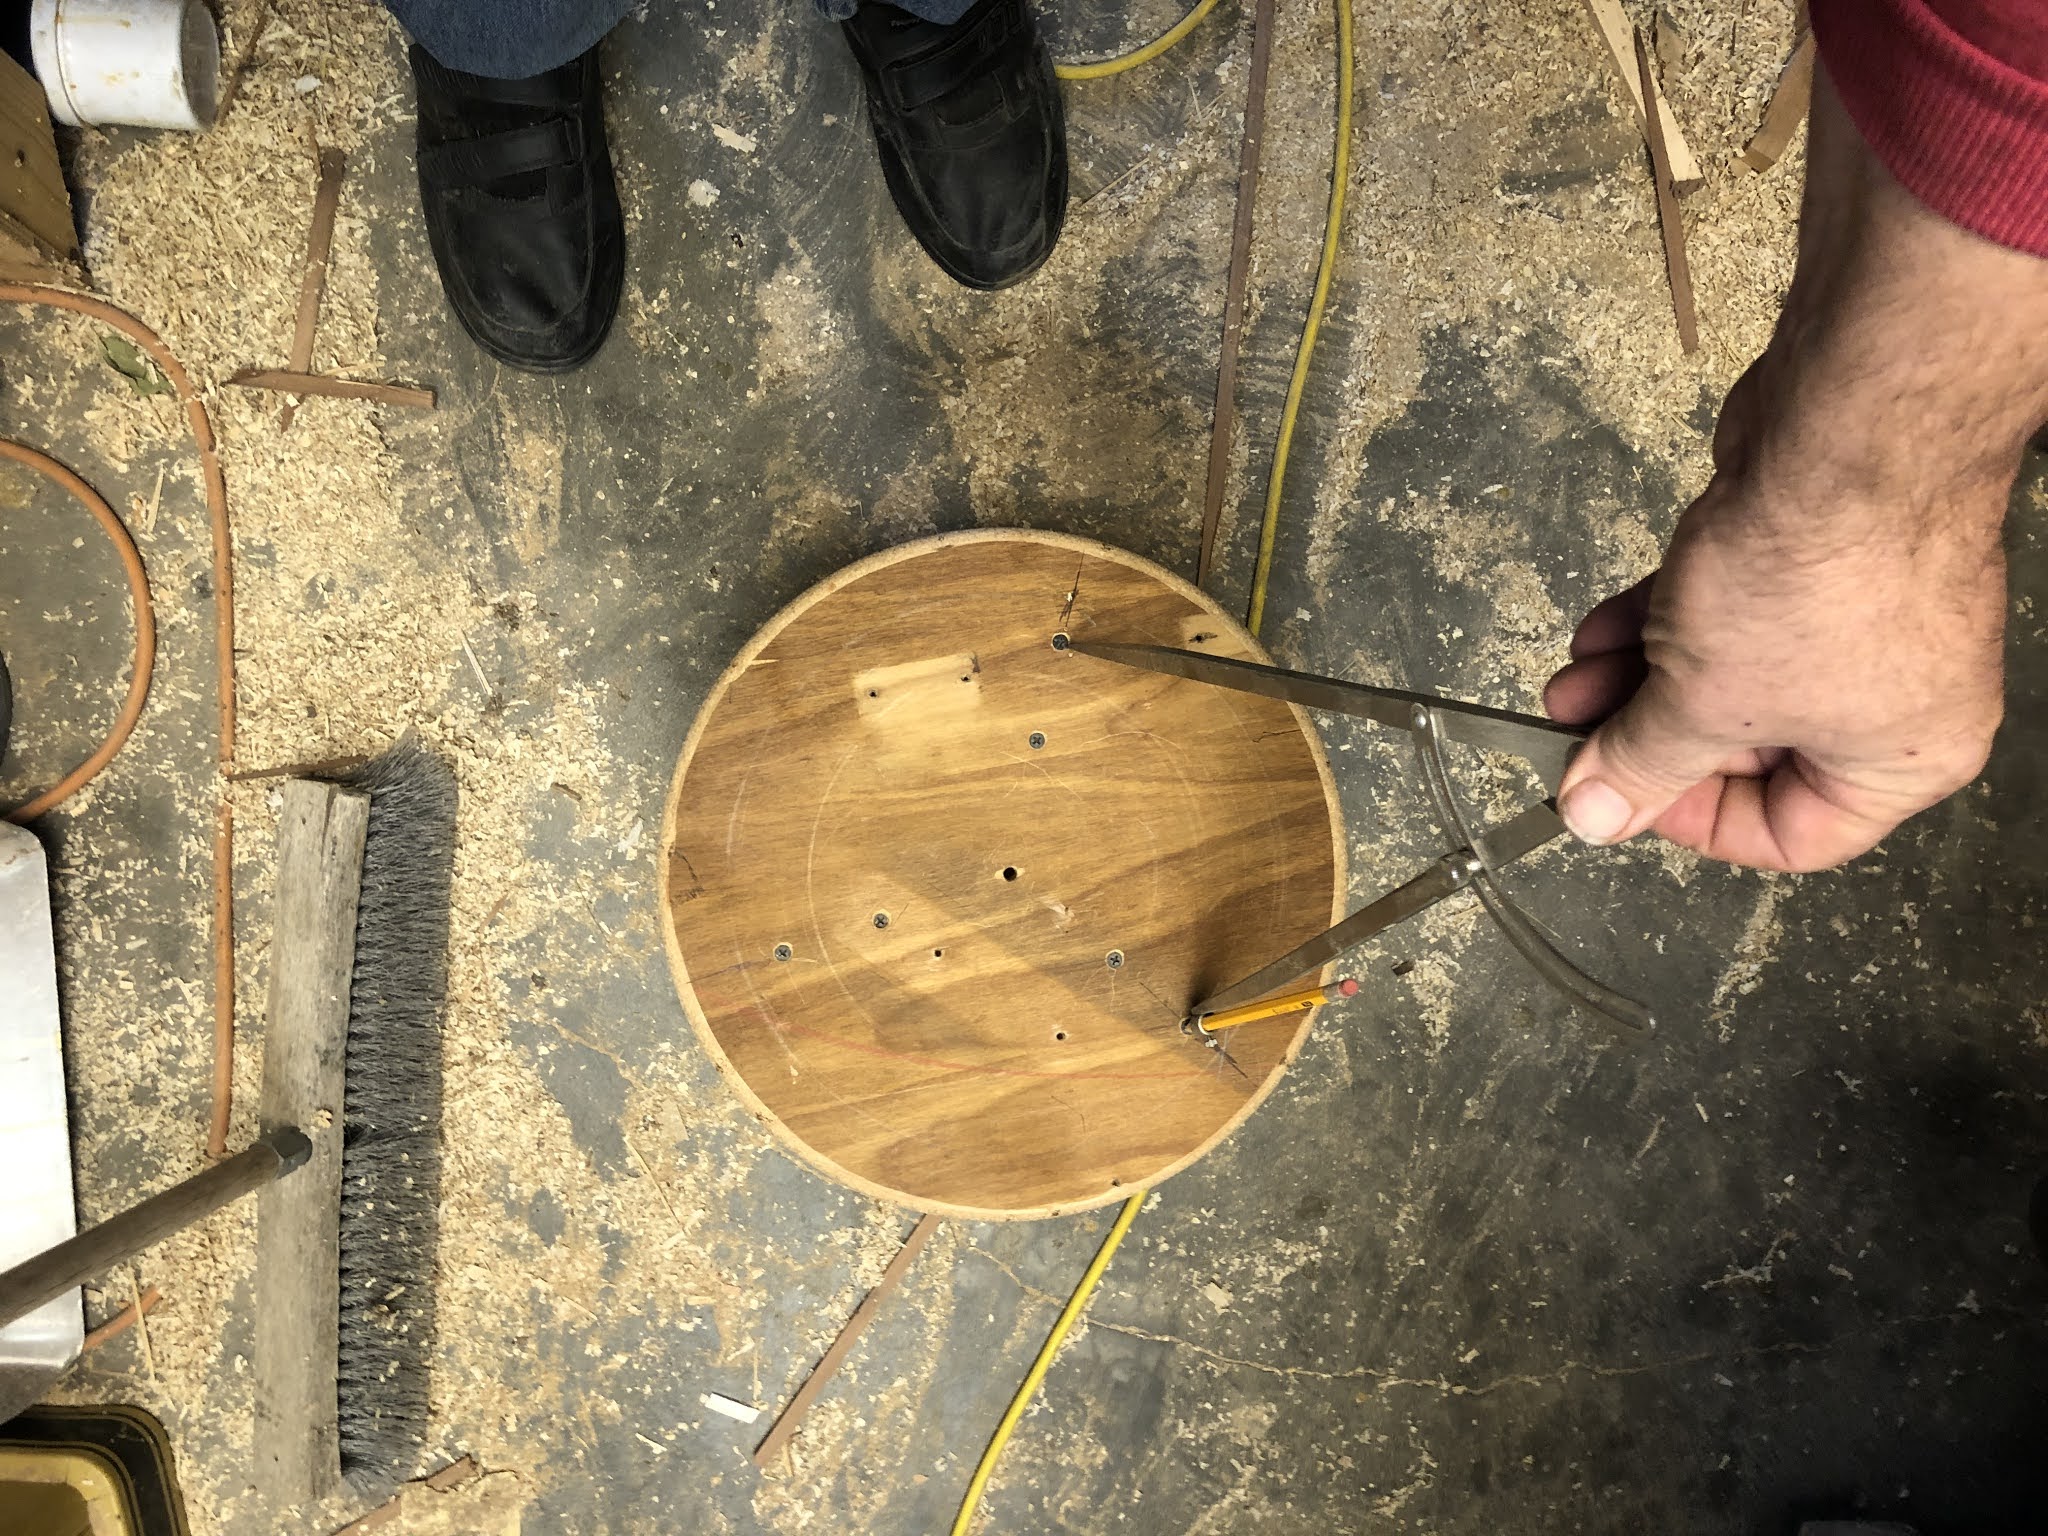
I get a surprising amount of use out of this simple jig. It was just something I cobbled together a while back but have not seen any need to improve on it. The micro adjustable table saw fence it clamps to makes it very precise.
 |  |
| First the outside circle is cut | Then the inside |
 |  |
| Top layer is cut as on piece | Bottom layer is pieced together |
| | |
| Top layer is cut as on piece | Bottom layer is pieced together |

This completes the wool installation on everything but the lid. Next I plan cut in the burner tube and coat the tank with satanite. When the satanite is heated it will also burn any coating off the tank lid. If I don't do that I doubt I can get the sodium silicate to stick to it.
I could have made the inside layer a little bit longer but I think it will be OK.
Then I will need to clean up the lid and grind in a bit of tooth for the SS to bind to. After that I will be applying the wool to the lid. Most apt to be Chripy style.
I have a fair bit of wool left. With luck I can use a lot of scrap on the cover but scraps will not cover it all.
The furnace ID is 14".
Should mention. The flue stub will be supporting a capped pipe covered with wool and satanite. Kind of like an upside down pipe crucible. Different length pipes will result in different vertical crucible positions. Yeah it's kind of experimental LOL
 |  |
| Mixing Satanite | Still Wet |