Monday, December 7, 2020

Fluxes


Today at 6:11 PM

hi
6:13 PM
the salt works because the salt is really agressive to oxides when molten, thats why if you use a salt flux in pottery and try firing it, it'll just tear the lining apart and eat it to no end, which alot of those bricks are made of aluminum oxide
6:14 PM
the 50/50 mix works because sodium chloride melts at 1450F, potassium chloride melts at 1500F, but when they melt together, they form an eutectic which melts at around 1000F
6:15 PM
there are different salts that you can add to that mix to drop it even lower, which is handy for dropping it down to the temp that zinc alloys can use
6:15 PM
@Dusty Dan @Helpful Hardware Professor
6:15 PM
and no need to add anything else to the flux tbh for aluminum, those two work perfectly fine

Today at 6:16 PM

So do you melt the salt together before using it as flux then?

Today at 6:16 PM

when they're really fine like you find in the containers of morton's lite salt, the grains are close enough together and well mixed enough that it can react with each other when it's in contact with the metal


Tuesday, December 1, 2020

Shims from common materials.


One can find many sources for stock 4 thou and up.  Paper, card stock etc.

For thinner I am trying aluminum foil.

  • Reynolds Pitmaster is 1.6 thou
  • Reynolds Heavy Duty is 1.0 thou
  • Regular foil is about .3 thou
That should about cover it

Together the Pitmaster and Heavy Duty run about $10 at my local grocery store, quite a bargain given that you still have the bulk of the foil to use in the kitchen.

I have seen pitmaster online for as much as $18.  Don't go there.

Update:


Made a hole punch on the lathe for punching the centers.   Started with round stock from rebar that was .450.    Drilled a .shallow 404 hole, desired hole size,  and through drilled a bit larger than 1/4" The flaw here is that my punched holes are .450 not .404.    Need to start with a .404 stock and drill a  .350 or so hole to get a .404 hole.  But these are clearance holes in aluminum foil so I don't see a problem.

It needs to be a shallow hole because wall thickness is .046/2 or .023.  Maybe one could use a smaller drill and sharpen after turning.  I am using this on the way it came off the lathe.   Position the foil on a block of wood and  run the punch a bit into the wood.  I folded six layers and punched them.  Was a bit much 4 might be better.   The outside edges can be trimmed after the bearing cap is tight.  

If I had drilled the .404 hole and sharpened from the outside the hole size would have be closer if not correct.  But when I got going I could see that the wall after drilling was thin enough that I did not need to sharpen it.

If I needed to punch leather or vinyl I might temper and sharpen the punch but its not needed here.


Update Nov 24 2021

Had the Atlas  10F spindle off to fix the thrust bearing so I had to reshim the bearings again.
Turned a new punch because I could not find the old one.  Used larger stock and put the taper on the outside as suggested above.  Made the hole a bit larger so foil does not run on the bolts.

The foil is a bit hard to manage.  Used elmer's spray adhesive to glue two sheets of pitmaster foil for shims that were about 3 thou.   These are much easier to handle.  I think I used 6 thou of shims on one side and 7 on the other front and back.


Tuesday, November 24, 2020

Tiki Torch Oil for cutting

Keep forgetting this so I am posting it for myself
70% baby oil, 30% tiki torch fuel
smokes like crazy but reduced tool pressure 

Monday, November 9, 2020

Determine aluminum pouring temperature with a steel rod

Have always heard about using a steel rod for checking aluminum temperature but never to this level of detail.

ChirpyYesterday at 7:05 PM

yea, those things are useless tbh

[7:05 PM]

next time, take a steel rod and stick it in the exhaust to heat it up for 10 seconds, then stick it into the metal to the bottom

[7:06 PM]

if it balls up on it, then it's too cold, if it sticks to it but easily fall off as a thin shell of aluminum, then that's perfect pouring temp for most castings, if it repels it like a magnet, then it's way too hot

And on Dec 7th


ChirpyToday at 3:33 PM
for thin castings in aluminum, you want it to be silver in daylight, but might have a little color to it in the furnace

[3:33 PM]
it shouldn't stick to a preheated steel rod, but shouldn't repel it like a magnet either

[3:34 PM]
I mean it shouldn't ball up on the steel rod, if it forms a super thin skin on it that easily falls off, then your good to go usually, or that gives you a good place to start from


Dusty DanToday at 3:58 PM
@Chirpy are we talking about a 1/2" or so rod ?


ChirpyToday at 3:59 PM
for what?


[3:59 PM]
oh, I usually just have a 3/8" rod or whatever, the bigger it is, the longer you have to preheat it


[3:59 PM]
other than that, i dont think it really matters tbh, lol


[4:00 PM]
I have some 3/8" rod and thats what I use just to poke the melt


Dusty DanToday at 4:00 PM
OK thats what I wanted to know

Saturday, November 7, 2020

Weld Positioner


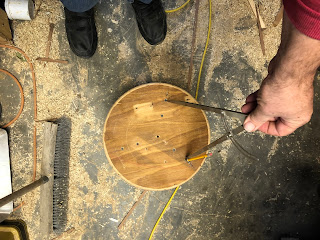
Given that I really can't weld I am thinking that a weld positioner might help when welding the caps on to my crucible pipes.

Turned the hub to a friction/binding fit on the 1 1/4" output shaft.   Will cut a keyway if it ever starts slipping.


Made the plate on the sidney.  Cut the center with a 1 1/2" hole saw mounted in the tail stock.  The bored it out to 2".  Cut the grooves with a carbide V bit.  Could not tripan the outer edge so I cut it with an angle grinder.  The plate is a bit warped anyway.  Plant to cast and machine an aluminum one.


About to cut the bolt circle on the hub.  Found out I can't use the 6 jaw chuck on the dividing head.  Too much unthreaded area.   Lost the light.  Start here tomorrow.

Used the special nuts I made to bolt the Master Mill to the Sidney compound circle to hold the dividing head to the drill press table.

Still need to set the drill position.  I think I can do that by manipulating the table.  Rotation and left/right.


Sunday


Working on the order of operations for drilling the bolt circle in the hub and plate.  The hole circle and dividing head are new to me so I need to think it out.   Going to need to switch between center drill, drill, tap,  and in case of the alignment pin a reamer.   Given that this is a round column drill press that is a problem.   Thinking the alignment hole can be hand reamed without the dividing head after the other holes are drilled and tapped.    

There will be 4 or 5 1/4" 20TPI bugle head screws and one 3/8" hole for an alignment pin used to reposition the hub for drilling additional plates. 
  1. Position plate on hub
  2. Center drill alignment hole
  3. Drill the 3/8" - 1/64",  23/64" alignment hole through plate and hub
  4. Insert drill to lock plate to hub.
  5. Center drill screw positions in plate
  6. Drill 1/4" clearance sized holes in but not through plate screw positions.
  7. Remove plate
  8. Finish drilling screw holes on 2nd drill press
  9. Center drill hub for screw holes
  10. Drill the #7 machine screw holes, tap size for 1/4" 20TPI
  11. Tap the screw holes
  12. Place plate on the hub using drill bit for alignment 
  13. Counter sink screw holes in plate using depth stop
  14. Remove hub from dividing head.  
  15. Ream the alignment hole in the plate and hub in one operation: why not stay with drill bit?
  16. Replace the hub on the dividing head using the alignment pin.
  17. Position the plate on the hub again using the pin.
  18. Center drill the machine screw positions.
  19. Remove the dividing hub from the drill and clearance drill the 1/4" screw holes.
  20. Counter sink the screw holes.

Monday

That did not go exactly as expected.   Tried reaming the pin holes by hand and it came out sloppy.  No way to ream it on the drill w/o moving the table.  Still I think the pin was the was to go.

Tapped the holes with a tap from a set from TSC's tool assortment table.   Not a good move.  Ended up snapping off a thread chaser in one of the 4 holes.   Went over the remaining 3 holes with the tap from my old set and ended up with an inch of useable thread. Works with 3.   Good enough.

Cut off the machine screws and counter sunk the plate for the heads.  Table has about 50 thou of unevenness near the edge.   That is noise level in terms of an arc distance so I am not going to worry about it.

Using the large drill, aka mud mixer, I can run the table at about .5 RPM.    This maybe to fast for a 4 inch pipe and is for larger diameters.   Net says 3-6 inches per minute.  .5 is right at 6.   I have a 2:1 box I could add between the drill and the gearbox but will try it without first.  Would need to make an adapter.  Maybe best cast one that mimics what is used between the first 2 boxes.

I may have the ground figured.   According to someone on the net dragging a mig tip instead of a copper brush works.   Going to try that first.  In it fails most of it can be used with a brush setup.

Tuesday


Monday


Extension and spring.Shoe 

Added a bit of flat stock at a right angle to the aluminum angle to gain clearance and position it closer to parallel to the table.

  
Ready to test

aaaa